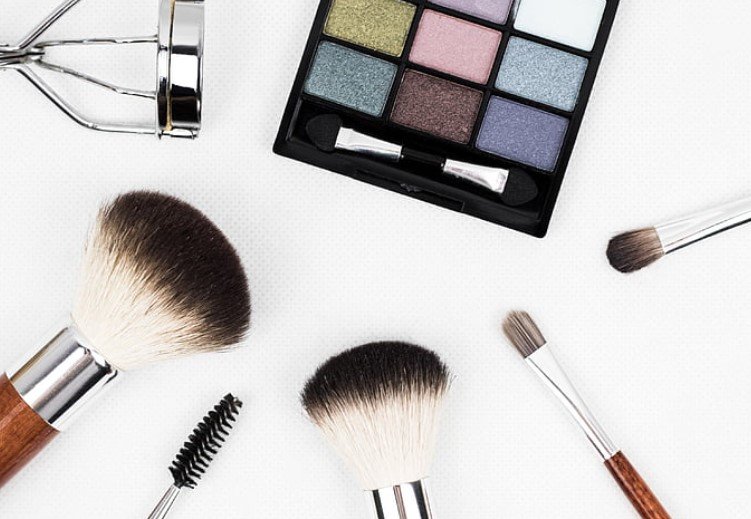
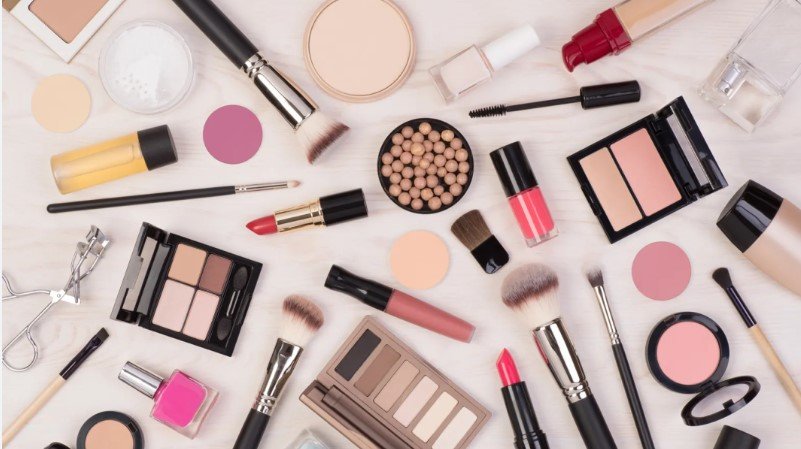
Do you ever wonder how our hairstyles, makeup trends, and beauty industry have evolved over the years? From the latest mascara to the hottest nails, hairstylists and beauty enthusiasts alike have witnessed incredible transformations. Well, let’s take a trip back to the groovy era of the 70s for some inspiration! Picture yourself surrounded by the beauty of pastel colors, with a bottom that reflects the vibrant and lively spirit of that time. This iconic decade was known for its unique sense of style, especially when it came to hair. Hairstylists played a crucial role in creating the beauty trends of the era, from bold nails to dramatic mascara. From feathered locks to afro hairstyles, there was something for everyone in terms of beauty. Whether it was finding the perfect mascara to enhance their lashes or experimenting with vibrant nail colour, attendees had plenty of options to express their personal style. So, if you’re ready to explore the fabulous world of 70s beauty, hair, and makeup
One of the most famous beauty hairstyles from the 70s was the feathered hair, made popular by none other than Farrah Fawcett. With her signature beauty, tousled waves, and voluminous layers, she became a style icon overnight. Another beauty trend that emerged during this time was celebrating the natural beauty of Black hair with afro hairstyles. These bold and beautiful looks were all about embracing one’s heritage and showcasing the beauty of natural curls.
If you were looking for height and drama, beehive updos were all the rage in the 70s. These towering hairstyles added a touch of glamour and sophistication to any look. On the other hand, those who preferred a sleeker style embraced long, straight locks. The simplicity of this trend allowed for versatility and elegance.

Iconic 70’s Makeup Looks
The 1970s were a time of self-expression and experimentation, and the makeup looks from this era were no exception. From sultry smoky eyes to bold eyeliner, the iconic 70’s makeup looks continue to inspire beauty trends even today.
Smoky eyes: Creating a sultry and mysterious allure.
One of the most popular makeup trends of the 70s was the smoky eye look. This technique involved blending dark eyeshadow shades, such as charcoal or deep browns, around the eyes to create a seductive and mysterious allure. The smoky eye look was often paired with long lashes and defined brows to enhance its dramatic effect. Celebrities like Farrah Fawcett and Cher were known for rocking this captivating style on red carpets and in their everyday lives.
Bold eyeliner: Channeling the rock ‘n’ roll spirit.
Another iconic trend from the 70s was bold eyeliner. Thick, winged liner became synonymous with the rock ‘n’ roll spirit of the era. Whether it was worn along the upper lash line or extended into a fierce cat-eye flick, bold eyeliner added an edgy touch to any makeup look. Stars like Debbie Harry from Blondie embraced this trend, using black liquid liner to define their eyes and make a statement.
Glowing skin: Radiating a healthy and natural glow.
In contrast to heavy foundation used in previous decades, 70s makeup focused on achieving a radiant complexion that looked fresh and natural. Instead of covering up imperfections, women aimed for glowing skin by using light coverage foundations or tinted moisturizers that allowed their natural beauty to shine through. This minimalistic approach created an effortless yet polished appearance that symbolized youthfulness and vitality.
To enhance their natural glow, individuals would apply peachy blushes on the apples of their cheeks for a subtle flush of color. This technique added a youthful and healthy look to their overall makeup.
Brightly colored eyeshadow: Making a statement with vibrant hues.
The 70s were all about embracing bold and vibrant colors, and this was certainly reflected in the makeup looks of the time. Brightly colored eyeshadows in shades like electric blue, emerald green, and vibrant purple were used to make a statement. Whether worn all over the lid or as an accent color, these vivid hues added a playful and daring element to any look.
Creating Volume: The Key to 70’s Hairstyles
The 70’s were all about big, voluminous hairstyles that made a statement. Whether you’re going for a retro look or simply want to add some oomph to your hair, creating volume is the key.
Teasing Technique: Adding Instant Volume at the Roots
Teasing, also known as backcombing or ratting, is a popular technique used in the 70’s to instantly add volume at the roots. To tease your hair, follow these steps:
Start by sectioning off a small portion of your hair near the crown.
Hold this section straight up and away from your head.
Take a fine-toothed comb and gently comb downwards towards the scalp in short strokes.
Repeat this process with small sections of hair until you’ve teased all desired areas.
Once you’ve achieved the desired level of volume, lightly smooth out the top layer of hair using a brush or comb to create a polished look.
Teasing can give your hair that signature 70’s lift, but be sure not to overdo it as excessive teasing can cause damage and breakage.
Using Hot Rollers or Curling Irons for Body and Bounce
Hot rollers and curling irons were widely used in the 70’s to create body and bounce in hairstyles. Here’s how you can use them:
Heat up your hot rollers or curling iron according to the manufacturer’s instructions.
Section off your hair into manageable portions.
Starting from the bottom layers, wrap each section around a hot roller or curling iron barrel.
Hold for a few seconds before releasing.
Repeat this process until all sections are curled.
Allow the curls to cool completely before gently brushing them out for a softer, voluminous look.
Finish with a light-hold hairspray to set the style.
Hot rollers and curling irons can give your hair that bouncy, glamorous look reminiscent of the 70’s.
Natural Waves and Curls: Embracing Texture
The 70’s era was all about embracing natural waves and curls. It was a time when women celebrated their hair’s unique texture and let go of the idea that straight hair was the only desirable look.
Emphasizing natural texture with minimal heat styling
One of the key aspects of achieving 70’s-inspired hairstyles is to minimize heat styling. Excessive use of hot tools can damage your hair over time, so it’s best to embrace your natural texture whenever possible. Instead of reaching for the curling iron or straightener, try these alternatives:
Air-drying: Allow your hair to dry naturally after washing, without using any heat. This will enhance your natural waves and curls while preventing unnecessary damage.
Plopping: After applying a curl-enhancing product, gently wrap your damp hair in a t-shirt or microfiber towel to encourage defined curls without using heat.
Bantu knots: Section your damp hair into small sections and twist each section tightly into a knot. Leave them overnight or until completely dry for beautiful bouncy curls.
Enhancing curls with curl-enhancing creams or gels
To make the most out of your natural waves and curls, incorporating curl-enhancing products into your routine is essential. These products help define and shape your curls while reducing frizz. Here are some options to consider:
Curl creams: Apply a generous amount of curl cream from roots to ends to enhance your natural texture. Scrunching the product into your hair will create more defined curls.
Curl gels: Gel-based products provide hold and definition for curly hairstyles. Apply evenly throughout damp hair before scrunching or finger coiling individual strands.
Diffusing hair to encourage natural wave patterns to form
If you prefer a more voluminous look with loose waves, using a diffuser attachment on your blow dryer can help achieve this effortlessly. Here’s how:
Apply a heat protectant spray or serum to your damp hair.
Attach the diffuser to your blow dryer and set it on low or medium heat.
Flip your head upside down and gather sections of your hair into the diffuser, allowing it to rest against the scalp
Shag Haircuts: Rocking the Effortlessly Cool Vibe
The 70’s were an era of bold and iconic hairstyles, and one that still continues to inspire trends today. Among the many popular styles of the time, shag haircuts quickly became all the rage. With their messy layers that frame the face in a carefree manner, choppy ends creating movement and texture, and the ability to rock bangs with shag cuts for an edgy look, it’s no wonder why this low-maintenance style exudes effortless coolness.
Shag haircuts are all about embracing a fun and free-spirited style. The layers add depth and dimension to your hair while giving it a playful bounce. The messy nature of this cut allows you to effortlessly achieve that “just rolled out of bed” look without sacrificing style. Whether you have long or short hair, a shag haircut can be tailored to suit your individual taste and personality.
One of the defining features of a shag haircut is its choppy ends. This technique adds movement and texture to your locks, giving them a lively appearance. The uneven edges create an edginess that sets this hairstyle apart from others. It’s a great way to add some flair to your overall look without going overboard.
Another reason why shag haircuts were so popular in the 70’s was because they allowed for versatile styling options. You could wear them sleek and straight for a polished look or embrace your natural waves for a more bohemian vibe. Adding some loose curls or beachy waves can enhance the carefree nature of this style even further.
If you’re looking for an easy-to-maintain hairstyle that doesn’t require constant touch-ups, then the shag haircut is perfect for you. Its low-maintenance nature means you can spend less time fussing over your hair and more time enjoying life. Simply run your fingers through your locks to tousle them up, and you’re good to go. It’s a style that effortlessly fits into any busy lifestyle.
Glitter Galore: Adding Sparkle to Your Makeup
Who doesn’t love a little sparkle? The 70’s were all about embracing bold and glamorous looks, andGlitter was the ultimate way to shine. Get ready to turn heads with shimmering eyeshadows, glittery eyeliner, sparkling highlighter, and even glitter lips!
Shimmering Eyeshadows That Catch the Light
One of the easiest ways to add a touch of disco glam to your eyes is by using shimmering eyeshadows. Opt for vibrant shades like gold or pastel blue that will make your eyes pop. Apply the shadow all over your lids for an intense look or use it as an accent on the inner corners for a subtle sparkle. Blend different shades together for a mesmerizing effect that screams 70’s.
Glittery Eyeliner for a Touch of Glam
If you want to take your eye makeup game up a notch, reach for glittery eyeliner. This versatile product allows you to create various looks depending on your mood. For a classic cat-eye with a twist, apply black liquid liner along your upper lash line and then layer it with a thin line of gold or silver glitter liner right above it. The result? A dazzling gaze that will mesmerize everyone around you.
Sparkling Highlighter on Cheekbones for an Ethereal Glow
To achieve that ethereal glow reminiscent of disco queens from the 70’s, don’t forget to add some sparkle to your cheekbones using a sparkling highlighter. Choose one with fine shimmer particles in champagne or rose gold tones that complement your skin tone. Apply it on top of your cheekbones and blend it outwards towards your temples for an instant radiant effect.
Glitter Lips to Make a Bold Statement
For a bold statement look, glitter lips are the way to go. Start by applying a lip gloss as a base to help the glitter adhere better. Then, using a lip brush or your finger, carefully press loose glitter onto your lips. You can choose from various shades like gold, silver, or even multi-colored glitters for an extra vibrant touch. Seal the glitter in place with a clear gloss or lip balm and get ready to pout like it’s the 70’s!
Retro Lipsticks: Finding the Perfect Shade
Looking to add a touch of vintage glamour to your makeup routine? One of the easiest and most effective ways to achieve that iconic 70’s look is by choosing the perfect retro lipstick shade. Whether you want a timeless red, a natural nude, a dramatic berry, or a fresh pop of coral, there’s a color out there that will transport you back in time.
Classic Red Lipstick for a Timeless and Glamorous Look
Nothing quite captures the essence of that era like classic red lipstick. A bold red lip instantly adds sophistication and glamour to any look. It exudes confidence and makes a statement wherever you go. To find the perfect shade of red for your complexion, consider these options:
Ruby Woo by MAC: This cult-favorite lipstick has been around since the 70’s and continues to be beloved for its vibrant blue-red tone.
Russian Red by MAC: If you prefer a slightly deeper red with cool undertones, this shade is perfect for achieving that retro vibe.
Dragon Girl by NARS: For those who lean towards brighter, more intense shades, this matte red offers long-lasting wear and an eye-catching pop of color.
Nude Shades to Achieve a Natural, 70’s-Inspired Lip
If you’re aiming for a more understated yet still effortlessly chic look inspired by the 70’s, nude lipsticks are your best friend. These shades create an illusion of naturally flushed lips while enhancing your features. Here are some popular options:
Velvet Teddy by MAC: This warm-toned nude with subtle pink undertones is universally flattering and gives off those coveted bohemian vibes.
Pillow Talk by Charlotte Tilbury: Known for its iconic soft pink hue, this lipstick provides a natural-looking pout that works well with any skin tone.
Honey Love by MAC: If you prefer a slightly cooler and more beige-toned nude, this shade is perfect for achieving a retro-inspired lip.
Deep Berry or Plum Tones for a Dramatic and Sophisticated Vibe
For those who want to channel their inner disco diva, deep berry or plum lipsticks are the way to go. These shades add drama and sophistication to any look, making them ideal for evening events or when you’re in the mood to make a bold statement.
Blush and Contour: Enhancing Your Features
Blush and contour techniques are essential. By strategically applying blush and contour, you can enhance your features, adding depth, dimension, and a touch of vintage charm. Let’s dive into the world of blush and contour and explore some expert tips to help you achieve that iconic 70’s vibe.
| Technique | Blush | Contour |
|---|---|---|
| Purpose | Adds color and warmth to the cheeks | Defines and sculpts facial features |
| Application | Applied on the apples of the cheeks | Applied on the hollows of the cheeks, temples, and jawline |
| Product Form | Powder, cream, or liquid | Powder or cream |
| Tools | Blush brush or fingers | Contour brush or angled brush |
| Shade Selection | Choose a shade that complements your skin tone | Choose a shade that is 1-2 shades darker than your skin tone |
| Blending | Blend well for a natural flush | Blend well for a seamless finish |
| Finish | Gives a healthy, youthful glow | Creates dimension and enhances bone structure |
| Suitable for | All skin types | All face shapes |
| Tips | Apply blush after foundation and before setting powder | Use a light hand and build up the contour gradually |
| Common Mistakes | Applying too much blush or applying it too low on the cheeks | Applying too much contour or using a shade that is too dark |
| Removal | Easily removed with makeup remover or cleanser | Easily removed with makeup remover or cleanser |
Applying Blush for a Youthful Flush
To achieve a youthful flush reminiscent of the 70’s, focus on applying blush to the apples of your cheeks. This technique adds a natural-looking rosy hue to your skin, creating a fresh-faced appearance. Start by selecting a blush shade that complements your skin tone – soft pinks or peachy tones work well for most individuals.
When applying blush, smile to locate the apples of your cheeks. Using a fluffy brush, gently sweep the blush onto these areas in upward motions towards your temples. This technique helps create a lifted effect while adding warmth to your complexion. Remember to blend the edges seamlessly for a natural finish.
Using Bronzer to Contour and Define
Contouring with bronzer is another key component of achieving those glamorous 70’s looks. Bronzer allows you to define facial features, creating shadows that add depth and structure to your face shape. Opt for matte bronzers without shimmer or glitter for an authentic retro feel.
Start by identifying areas where shadows naturally occur on your face – typically along the hollows of your cheeks, temples, jawline, and sides of the nose. Using an angled brush or contour brush, apply bronzer in these areas using light-handed strokes. Build up gradually until you achieve the desired intensity.
Remember that less is often more. Blending is crucial here as well – use circular motions or back-and-forth motions to blend the bronzer seamlessly into your skin, ensuring a natural-looking finish.
Illuminating Your Features
In the 70’s, an illuminated complexion was highly sought after. To achieve this radiant look, highlighter is your secret weapon. Focus on enhancing your cheekbones, brow bones, and the bridge of your nose with a touch of shimmering highlighter.
Choose a highlighter shade that complements your skin tone – champagne tones work well for fair to medium skin tones, while golden hues suit deeper skin tones.
False Lashes: Achieving Dramatic Eye Effects
If you’re looking to add a touch of glamour and drama to your 70’s-inspired look, false lashes are the perfect accessory. They can instantly transform your eyes, making them appear fuller, longer, and more alluring. With a wide variety of options available, it’s important to choose the right false lashes and apply them correctly for the desired effect. Here are some tips to help you achieve those stunning eye effects.
| Recommended False Lashes | Application Tips |
|---|---|
| 1. Ardell Demi Wispies | Trim the lash strip to fit your eye shape |
| 2. Eylure Dramatic No. 126 | Apply a thin layer of lash glue along the lash band |
| 3. Velour Lashes Whispie Sweet Nothings | Use tweezers to carefully place the lashes as close to your natural lash line as possible |
| 4. House of Lashes Iconic | Press the lashes down gently to secure them in place |
| 5. Lilly Lashes Miami | Apply mascara to blend your natural lashes with the false lashes |
| 6. Huda Beauty Samantha | Remove the lashes by gently pulling them off from the outer corner of your eye |
| 7. Tarte Tarteist Pro Cruelty-Free Lashes | Store the lashes in their original packaging to maintain their shape and prolong their lifespan |
Choosing false lashes with varying lengths and thicknesses.
When selecting false lashes, consider the overall look you want to achieve. If you’re aiming for a natural yet enhanced appearance, opt for lashes with varying lengths that mimic your own lashes. These will provide subtle volume without overpowering your eyes. On the other hand, if you’re going for a bold and dramatic effect, choose lashes with extra length and thickness. These will make your eyes stand out in any crowd.
Applying lash glue evenly along the lash band for secure attachment.
To ensure that your falsies stay put throughout the day or night, it’s crucial to apply lash glue evenly along the entire lash band. Squeeze a small amount of adhesive onto a clean surface or use a specialized lash glue applicator. Using tweezers or your fingertips, gently coat the band with glue from end to end. Wait a few seconds for the glue to become tacky before applying the lashes as close to your natural lash line as possible.
Curling natural lashes before applying falsies for better blending.
For seamless integration between your natural lashes and falsies, curling your own lashes is essential. Before applying false eyelashes, use an eyelash curler to give your natural lashes some lift and shape. This step ensures that both sets of lashes blend together seamlessly while creating an open-eyed effect that draws attention to your peepers.
Trimming false lashes to fit your eye shape perfectly.
No two eyes are the same, so it’s important to customize your false lashes to fit your unique eye shape. Before applying them, measure the length of the lash band against your eyelid. If they extend beyond the outer corner of your eye, trim them accordingly. Using small scissors, carefully cut from the outer edge to maintain the natural tapering effect. Remember to always trim a little at a time and test for fit before making further adjustments.
70’s Makeup Trends: Exploring Disco Glam
The 70s was an era known for its vibrant and daring fashion choices, and the makeup trends of the time were no exception. Disco glam took center stage, with bold and eye-catching looks that perfectly complemented the flashy outfits on the dance floor. Let’s dive into some of the iconic makeup trends from the disco era.
| Makeup Trend | Description |
|---|---|
| Glittery Eyes |
|
| Dramatic Eyelashes |
|
| Bold Eyebrows |
|
| Bright Lips |
|
| Sun-Kissed Glow |
|
Metallic Eyeshadows in Bold Colors
One of the defining features of 70s makeup was the use of metallic eyeshadows in striking shades like gold, silver, or bronze. These shimmering hues added a touch of glamour to any look and instantly caught attention under disco lights. The disco divas embraced their inner sparkle by applying these bold colors across their eyelids, creating a mesmerizing effect that mirrored the glitz and excitement of the dancefloor.
To achieve this trend, consider using:
Gold eyeshadow paired with a deep red lip for a sultry look.
Silver eyeshadow combined with a glossy nude lip for a more understated approach.
Bronze eyeshadow accompanied by a bright pink lip to make a statement.
Glossy Lips with High-Shine Lip Gloss
In true disco fashion, lips were all about high-shine gloss in vibrant shades. Whether it was ruby red or electric pink, glossy lips were an essential part of any disco-inspired look. This luscious finish added dimension to the face while drawing attention to one’s pout.
To rock this trend, try out:
A classic red lip gloss paired with winged eyeliner for a timeless disco look.
A hot pink lip gloss combined with colorful mascara to embrace full-on 70s vibrancy.
A peachy nude lip gloss complemented by bronzed cheeks for a more natural yet glamorous appearance.
Dramatic Winged Eyeliner Extending Beyond the Outer Corners
No disco-inspired makeup look would be complete without dramatic winged eyeliner. In the 70s, this iconic trend was taken to new heights as the liner extended beyond the outer corners of the eyes, creating a bold and elongated shape. This technique accentuated the eyes and added an air of mystery and allure.
Conclusion
Congratulations! You’ve now explored the vibrant world of 70’s hairstyles and makeup. From iconic looks to disco glam trends, we’ve covered it all. Now it’s time to unleash your inner retro diva and rock those groovy styles with confidence!
But before you go, remember that practice makes perfect. Experiment with different techniques, products, and colors to find what works best for you. Don’t be afraid to embrace your natural texture or add a touch of glitter for some extra sparkle. And most importantly, have fun with it! The 70’s were all about self-expression and embracing individuality.
So go ahead, grab your curling iron, dust off those bell-bottoms, and get ready to turn heads with your fabulous 70’s-inspired look. Whether you’re attending a costume party or just want to add a retro twist to your everyday style, these tips will help you channel the spirit of the era in no time!
FAQ
[faq-schema id=”204″]